Jekyll search with Typeahead.js
One of my first concerns with starting my blog on GitHub pages was the lack of server-side programming. It means you can't easily pull off many blog standards, such as search. In this post you'll see how I did it.
Typeahead.js by Twitter
I don't believe in reinventing the wheel, so, I went searching for an auto-complete library. Enter Typeahead.js.
Typeahead is a “fast and fully-featured autocomplete library” by Twitter. The API is very simple and it provides a nice UI to search.
This code will turn the targeted input[type="text"] into an autocompleting
search box for the prefetched json file, which we'll come onto later.
Note that typeahead does have a dependency on jQuery 1.9+.
This is great but it doesn't actually do anything yet. Luckily, typeahead also has built in events to listen for.
Now, when an autocomplete option is selected the reader will be redirected to the page of that post. Simples.
search.json
In order to search, we'll now need something to actually search.
If you've already made a blog in Jekyll you'll know all about the site.posts
array and how to loop through it getting the data about each post. If you need a
refresher
here are the docs for the simliar paginator.posts
array.
The first thing to understand about Jekyll is that anything that contains YAML front-matter will be processed by Jekyll as a special page.
Here's how my search.json file looks:
---
---
[
    {% for post in site.posts %}
    {% assign title = post.title | split:' ' %}
    {% assign date = post.date | date_to_long_string | split:' ' %}
    {
        "value": "{{ post.title }}",
        "tokens": [
            {% for tag in post.tags %}"{{ tag }}",{% endfor %}
            {% for word in title %}"{{ word }}",{% endfor %}
            {% for word in date %}"{{ word }}",{% endfor %}
            false
            ],
        "date": "{{ post.date | date_to_long_string }}",
        "url": "{{ post.url }}"
    },
    {% endfor %}
    false
]
The first two lines are empty YAML front-matter, to tell Jekyll to process this
file. Next, I open the array and start looping through my posts with
{% for post in site.posts %}.
The canonical data structure typeahead expects is an object with value and
tokens properties. The value is a string which represents the underlying
value. The tokens is an array of single-word strings that typeahead uses to
match the value to the search query.
I used the built-in filter split in order to create arrays of single words for
both the title and the data:
{% assign title = post.title | split:' ' %}
{% assign date = post.date | date_to_long_string | split:' ' %}
This allowed me to then loop through each word and add it to the array.
{% for tag in post.tags %}"{{ tag }}",{% endfor %}
{% for word in title %}"{{ word }}",{% endfor %}
{% for word in date %}"{{ word }}",{% endfor %}
The post.tags are already an array, defined in the post front-matter.
Typeahead also allows extra properties which will be passed along with the result; I added the date and a url.
If you look at the event listener code again you'll see I accessed the
data.url property of the returned object.
Enhancements
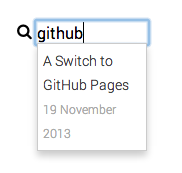
So, that works nicely, however when someone is searching my posts I want them to be able to see what date it was published before they go looking at an outdated post.
By default, typeahead only displays the data.value in the search results but
it also allows you to pass in a template and templatating engine to do custom
results.
I decided to include Hogan.js, a mustache templating engine also developed by Twitter.
Now my search initialization looks like this:
var search = $('#search')
  .typeahead({
    prefetch: '/search.json',
    template: [ {{value}}', '{{date}}' ].join(''),
    engine: Hogan
  });
As you can see, I passed in two extra properties to typeahead, a template and
an engine. This allows me to create custom search results including the
publication date.
There we have it: a functional search box on a Jekyll blog. Unfortunately it only works for those with js enabled, but, hey, progressive enhancement!